Garlic.com Support: Outlook on Windows (Domains)
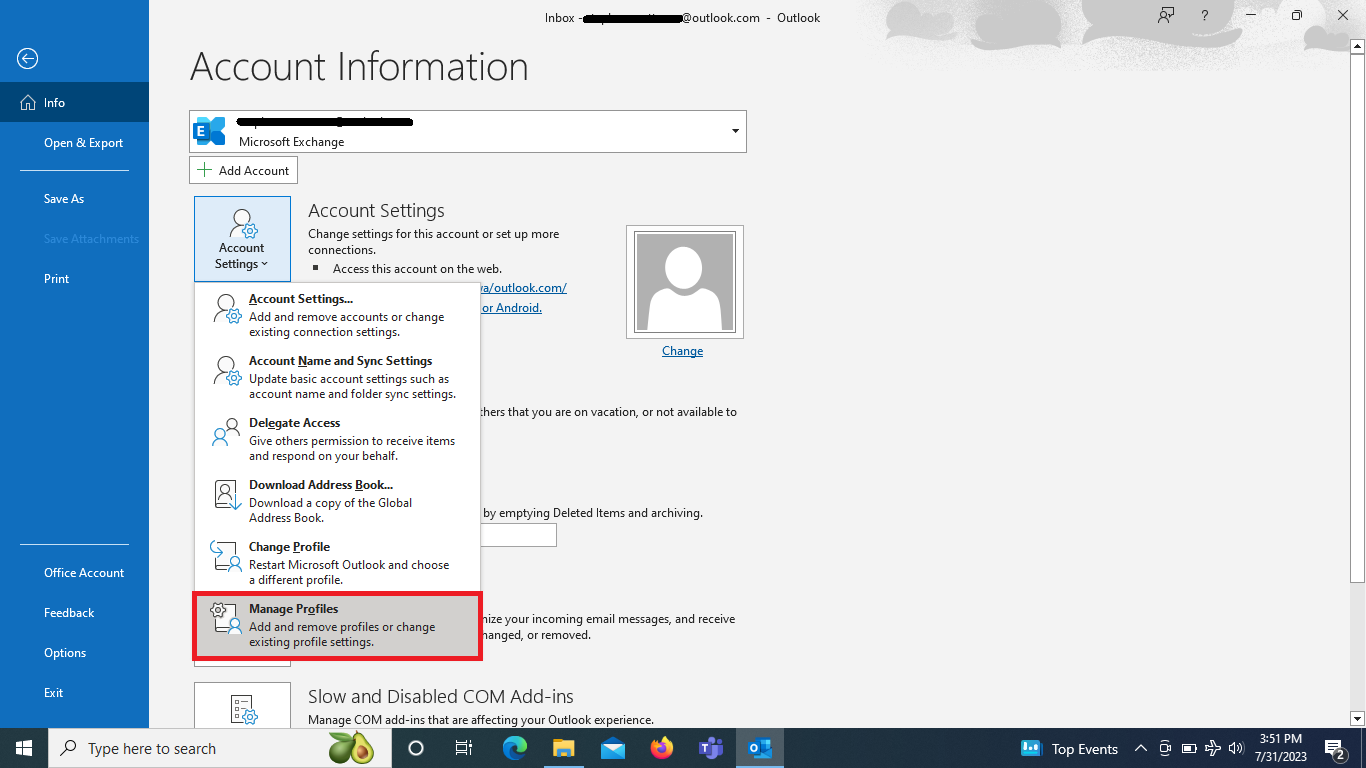
Open up Outlook on Windows 10, Select “File”.
Click on “Info”, “Account Settings”, “Manage Profiles”.
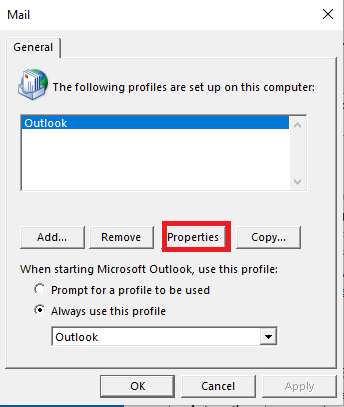
Click on “Show Profiles…”.
If the correct profile is already selected (there is usually only one called “Outlook”), click “Properties”.
Click “Email Accounts…”.
Click “New…” to create a new account.
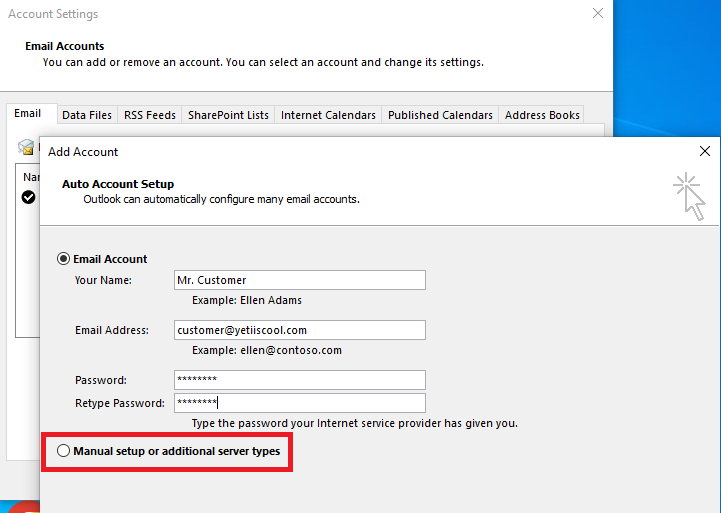
Click “Manual Setup or additional server types” and then click “Next”.
Select “POP or IMAP”. Click “Next”.
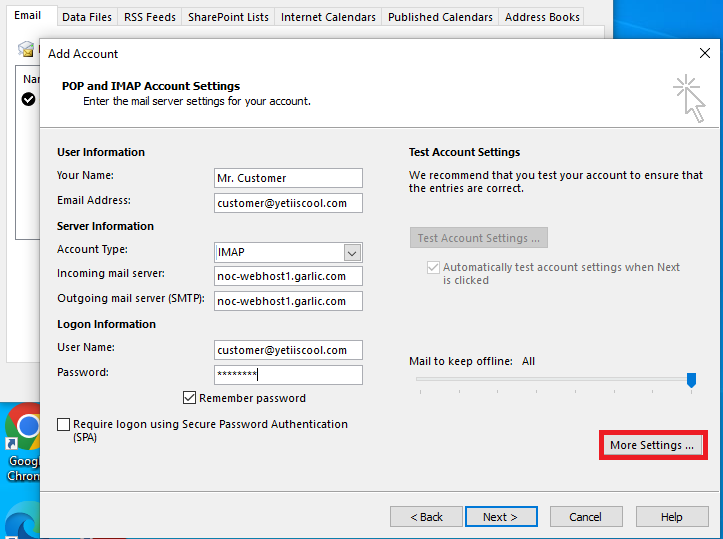
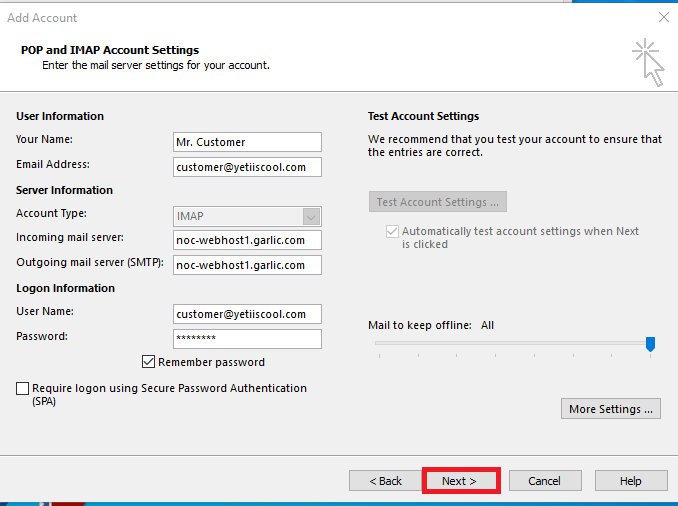
You are now at the main configuration page. Enter “Name” and “Email Address”, then you will want to use the drop-down menu to select IMAP, and for incoming mail server, type “noc-webhost1.garlic.com”, and for outgoing mail server (SMTP), type “noc-webhost1.garlic.com”. Click “More Settings…”.
Under the “Outgoing Server” tab, make sure that “My outgoing server (SMTP) requires authentication” is checked, and also checked “Use same settings as my incoming mail server”.
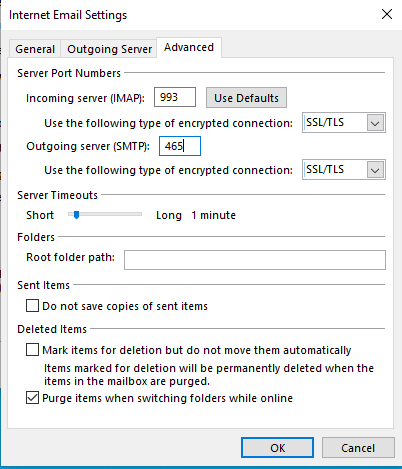
Under the “Advanced” tab, make sure that “Incoming server (IMAP)” port 993 is configured, and uses “SSL/TLS” encryption. For “Outgoing server (SMTP)”, make sure that port 465 is configured, using “SSL/TLS”. All other settings should remain the way they are, and click “OK”.
You will be returned back to the previous main configuration page. Now click “Next”.
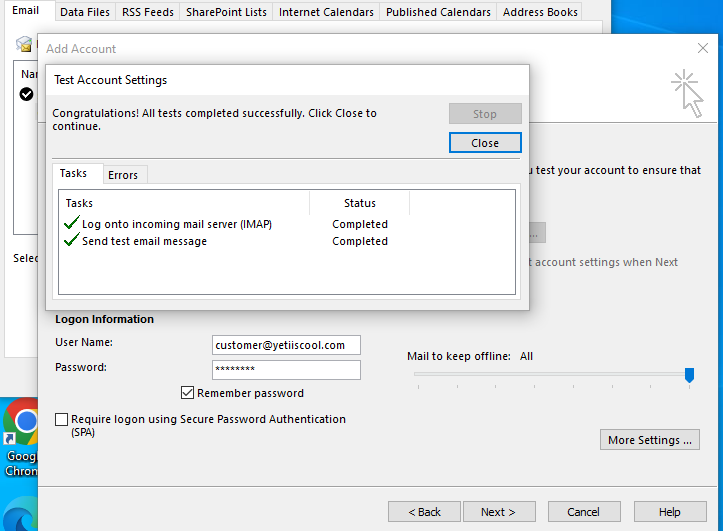
Outlook will test your configuration and you should see two green checkmarks indicating completed. Click “Close”.
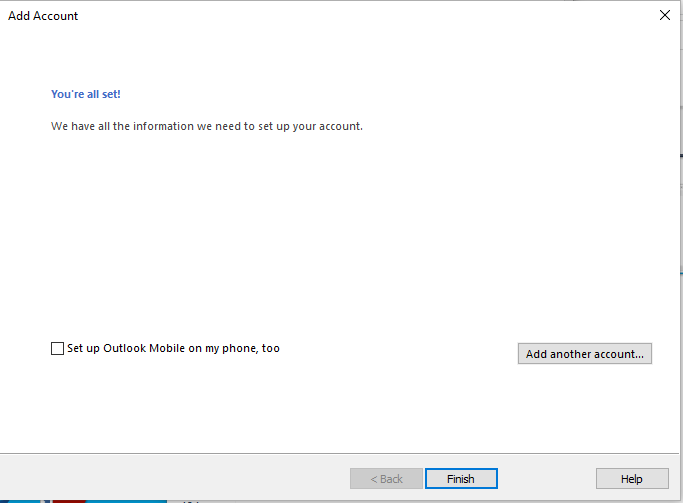
You’re all set! Uncheck “Setup Outlook Mobile on my phone, too”. Click Finish.
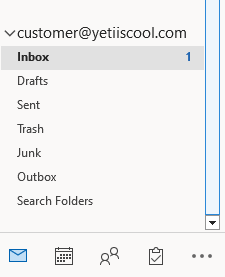
Click Close, then Close again, then use the back arrow to get to your Inboxes. Once you unhide the left pane in Outlook, you should see your Inbox.
Test your email by sending and receiving a test message.


